Tuesday, March 13, 2012

Butterscotch Banana Bread (Vegan!)


I went home for Spring Break, and my siblings immediately wanted to bake. It was nice to get back into the baking groove! I can't wait to go home this summer so I can start regularly updating this blog again. 

We chose banana bread, because we had an ENORMOUS amount of bananas in the house just ripening. It's my family tradition to make my mom's banana bread, so she asked my siblings, my grandmother, and me to make it. However, that recipe has eggs and milk. So we created a new version that's vegan! AND we incorporated vegan butterscotch chips I had ordered online over the summer into the recipe. It was SO delicious, especially because the butterscotch chips just melt and soak into the bread.

Phone quality photos again, sorry!

Ingredients:
***Use these measurements to make about 20 servings of this dish***
  • 1 cup (+ additional) of brown sugar
  • 1 cup of white sugar
  • 1 cup of vegan butter
  • 6 mashed bananas
  • 4 cups of whole wheat flour
  • 1 teaspoon of baking soda
  • 2 teaspoons of apple cider vinegar
  • ½ cup of non-dairy milk 
  • 2 teaspoons of vanilla
  • 1 tablespoon of cinnamon
  • 1 teaspoon of salt
  • 1 cup of butterscotch chips
Method:
  1. Preheat oven to 350°F.
  2. Grease a brownie pan with nonstick spray or vegan shortening.
  3. Mash the bananas to a pulp.
  4. Add the soy milk and apple cider vinegar to the banana mixture, and let sit until needed.
  5. In a bowl, cream the butter, white sugar, brown sugar, and vanilla.
  6. Add in the mashed bananas mixture.
  7. In a separate large bowl, mix the flour, baking soda, salt, and cinnamon well.
  8. Add the liquid mixture to the flour mixture, and combine well.
  9. Fold in the butterscotch chips.
  10. Once all parts of the mixture are thoroughly mixed, pour into pan and even out.
  11. Sprinkle brown sugar and butterscotch on top of mixture, if desired.
  12. Bake for 1 hour, or until fork inserted into the center of the dish comes out dry and clean.

The mashed bananas.

My brother did a great job at creaming the butter with the sugars!

The combined batter.

The just-finished bread!

A slice of the butterscotch banana bread! It all was gobbled up in a few hours.

Questions? Comments? Suggestions? Did you try this recipe out?
Please let me know in the comments!


Thursday, March 8, 2012

Raspberry Brownies (Vegan!)


As I said in my last post, I don't have a lot of time to cook at school (especially without my own kitchen,) but I will update here from time to time when I do!

I was involved in a movie-themed cook-off, and my cook-off partner wanted something with raspberries and chocolate. Thus, these brownies were born. I have to give credit to my friend Dan Wolfe for helping me out with the majority of this recipe and providing me with the kitchen!

You MUST be a fan of raspberries to enjoy these brownies! People who were raspberry fans really enjoyed these, but others couldn't really appreciate them. They are very raspberry-intense!

Also, I didn't have my camera on me, so sorry for the phone-quality photos.

Ingredients:
***Use these measurements to make about 20 servings of this dish***
  • 1½ cups of whole wheat flour
  • 1 cup of cocoa powder
  • 1 tablespoon of baking powder
  • 1 teaspoon of baking soda
  • 1 teaspoon of salt
  • 3/4 cup of non-dairy milk (vanilla-flavored adds depth to the recipe!)
  • 2 cups of fresh raspberries (mashed) OR 2 cups of raspberry preserves (we did 1 cup of each)
  • 1 cup of brown sugar
  • 2 teaspoons of vanilla
  • 1 cup of chocolate chips
  • 1 cup of whole fresh raspberries
  • a pinch of powdered sugar to your pleasing
Method:
  1. Preheat oven to 350°F.
  2. Grease a brownie pan with nonstick spray or vegan shortening.
  3. In a large bowl, mix the flour, cocoa powder, baking powder, baking soda, and salt.
  4. In a different bowl, mix the mashed berries / raspberry preserves, milk, sugar, and vanilla.
  5. Add the flour mixture to the berry mixture until just barely combined.
  6. Fold in the chocolate chips and fresh berries.
  7. Once all parts of the mixture are thoroughly mixed, pour into pan and even out.
  8. Bake for 20 minutes, or until fork inserted into the center of the dish comes out dry and clean.
  9. Sprinkle with powdered sugar, and serve right away, or refrigerate. 

The dry mixture.

The mashed raspberries and raspberry preserves being combined.

The whole raspberries and chocolate-chips being folded into the combined mixture.

Our sample for the judges! It was a movie-themed cook-off, and we thought "The Shining" was a good fit to the aesthetic of our dish.

The finished brownie pan!

Questions? Comments? Suggestions? Did you try this recipe out?
Please let me know in the comments!


Thursday, October 13, 2011

Roasted Vegetable Medley (Vegan!)


Sorry it has been SO LONG since I last updated! I have been extremely busy with school. Also, the fact that I don't have a kitchen of my own at school makes it a bit complicated to cook. However, my friend Kevin Hershey has given me use of his kitchen, so hopefully I will be updating more regularly.

Speaking of Kevin, this is his recipe! It is extremely easy and very straightforward. It can be done with virtually any vegetable, but I thought I would post it anyway, just to remind everyone out there that eating pure vegetables can be a fantastic meal in and of itself!

Don't believe me? I only have two photos of the process, because that is how easy it was to make this delicious dish...

Ingredients:
***Use these measurements to make about 5 servings of this dish***
  • 1 sweet potato
  • 1/2 onion
  • 1 red pepper
  • 1 yellow pepper
  • 1 eggplant
  • 1 tablespoon of Italian seasoning (what we used) / chili powder / basil / any spice you want!
  • 1 tablespoon of black pepper 
  • 3 tablespoons of olive oil
Method:
  1. Preheat oven to 400°F.
  2. Place sweet potato into a large pot. Fill with water, and boil on medium high heat for 15 minutes, or until sweet potato is tender.
  3. While sweet potato is boiling, mince/dice/cut onion, peppers, and eggplant into whatever size you would like to consume them.
  4. Carefully remove sweet potato, and slice it into rounds or pieces.
  5. On a baking pan covered in aluminum foil and baking spray, lay all the vegetables out.
  6. Drizzle vegetables with olive oil, and then use hands to make sure vegetables are thoroughly coated.
  7. Sprinkle vegetables with seasoning and black pepper.
  8. Place into the oven for 1 hour.
  9. Remove from oven and let cool for 15 minutes before eating!
The vegetables and seasoning before the oven...

...and after!


Questions? Comments? Suggestions? Did you try this recipe out?
Please let me know in the comments!

Sunday, August 28, 2011

Potato Chickpea Curry (Vegan!)


My mom woke me up this morning by telling me to make potato curry for the family. So, I took that opportunity to come up with a rich vegan curry, with not just potatoes, but chickpeas as well. A lot of my friends have been saying they want more Indian recipes featured on Vegephant, so I hope this is a good start! It's extremely easy to make, if you have the ingredients. All the spices can be easily found at any Indian/Middle Eastern grocery store, or online.

Also, I don't know if I've mentioned it before... but I'm obsessed with Sriracha sauce, so I always look for opportunities to add it to my meals. If you don't like/have Sriracha sauce for this recipe, just add some more chili pepper powder for the added spiciness.


Ingredients:
***Use these measurements to make about 10 servings of this dish***
  • 5 potatoes
  • 1 can of garbanzo beans/chickpeas
  • 3 tablespoons vegetable oil
  • 1 teaspoon of mustard seeds
  • 1 onion
  • 2 cloves of garlic
  • 2 teaspoons ground or whole cumin
  • 1 teaspoon of chili pepper powder
  • 1 tablespoon of curry powder
  • 1 tablespoon of garam masala
  • 1 tablespoon of salt
  • 1 tablespoon of turmeric powder
  • 2 tablespoons of Sriracha sauce
Method:
  1. Place potatoes and drained chickpeas into a large pot. Fill with salted water, and boil on medium high heat for 15 minutes, or until vegetables are tender.
  2. Mince/dice onion and garlic into small pieces.
  3. While potatoes and chickpeas are boiling, put the vegetable oil in a large skillet over medium heat.
  4. When after 2 minutes, add in mustard seeds.
  5. When the mustard seeds start to make a popping noise, add the garlic and onion into the skillet. 
  6. Continue to let onion and garlic cook until the onion turns fairly translucent (this should take 5 to 10 minutes.)
  7. Mix in cumin, chili pepper powder, curry powder, garam masala, and salt.
  8. Lower heat to low and allow onion mixture to simmer.
  9. Once your potatoes/chickpeas are tender, drain the pot of water, and peel the skins off the potatoes. (I advise doing this while running the potatoes until cold sink water.) 
  10. Once skins are peeled off of the potatoes, chop the potatoes into small pieces.
  11. Add the chopped potatoes and chickpeas to the onion mixture.
  12. Add in turmeric powder and Sriracha sauce, and mix well until potatoes turn bright yellow.
  13. Cook and continuously mix the curry for 15 minutes more, after adding potatoes and chickpeas. Add more salt to taste, if necessary.
  14. Serve hot with Indian bread or rice!
The potatoes and chickpeas, pre-boil.

The onion and garlic simmering with the spices.

Peeling the potato skins. The skins should come off effortlessly. Run the potatoes under cold water to make this process easier!

The almost-finished curry, with Sriracha sauce drizzled on top.

Finished curry! This is a great starter curry, if you are a beginner at Indian cooking. It tastes great with naan, rice, chapathis, 'regular' bread, or alone!


Questions? Comments? Suggestions? Did you try this recipe out?
Please let me know in the comments!


Agave Apple Scones (Vegan!)


I had way too many apples in my house... and I have always wanted to make scones, as I love the texture. My mom also told me to use finish off all my baking ingredients in the house, before I go back to school (so expect a LOT of baking recipes this week!) This recipe helped with all of that AND it tasted absolutely wonderful.

The scones themselves aren't too sweet; they actually remind me of a rich shortbread. So, if you do want added sweetness, I would add powdered sugar to the top of them, after baking. They are awesome alone, though!


Ingredients:
***Use these measurements to make about 16 servings of this dish***
  • 1 cup of non-dairy milk
  • 1 teaspoon of apple-cider vinegar
  • 2 teaspoons of vanilla extract
  • ¼ cup of cornstarch powder
  • 4 cups of whole wheat flour 
  • 1 teaspoon of salt
  • 2 teaspoons of baking powder
  • 1 teaspoon of baking soda
  • 1 teaspoon of cinnamon
  • 1 cup of (vegan) butter/shortening
  • 3 apples
  • 1 cup of agave nectar (or maple syrup... if you don't have agave, but it will taste very mapley)
  • Optional: powdered sugar and/or agave nectar for topping

Method:
  1. Preheat oven to 375°F.
  2. Grease a baking sheet with nonstick spray or vegan shortening.
  3. In a separate cup, pour the milk and add in the apple cider vinegar, vanilla extract, and cornstarch. Do not mix or touch. It will curdle to make a buttermilk-like consistency, which you will use at a later step of the recipe.
  4. In a large bowl, mix the flour, baking powder, baking soda, cinnamon, and salt.
  5. Soften the butter in the microwave (until it is SOFT, not melted,) and add to the flour mixture. Mix this thoroughly. 
  6. Cut your apples into small pieces.
  7. Fold the apples into the flour mixture.
  8. Once the milk/apple cider vinegar/vanilla/cornstarch mixture is chunky and smells putrid, stir it gently, and then pour it into the flour mixture until it reaches a firm, dough-like consistency.
  9. Add your agave nectar to the mixture as well. Mix ingredients until a dough ball forms.
  10. Take the dough to a floured area, and knead gently until a secure ball is formed and the ingredients are certainly combined.
  11. Break your secure dough ball into two smaller balls, and place onto the baking sheet.
  12. Use a knife, and slice up each ball into 8 wedges. You don’t have to separate them, just slice them so the separation post-baking will be easier.
  13. Bake in the oven for 30 minutes.
  14. Use your knife to cut along the wedge lines and separate.
  15. Let scones cool to room temperature before serving. 
  16. Serve with powdered sugar for an extra-special treat!
The dry mixture with apples folded in.

 The finished dough.
 The dough divided into two and cut with a knife (not separated.)
 The scones right out of the oven. See how the cutting before helped?
A beautiful finished scone, with powdered sugar on top!


Questions? Comments? Suggestions? Did you try this recipe out?
Please let me know in the comments!


Wednesday, August 24, 2011

Mint Ice Cream (& Toppings) (Vegan!)


I've been wanting to make a new flavor of ice cream for a while... I polled my friends on which they would like, and my friend James suggested mint. A huge number of people agreed with him, and hence... I made mint ice cream. Mint also happens to be my favorite flavor, as well. I added chocolate chips, because mint chocolate-chip is always a lovely treat.

It is supremely decadent on its own, but when you add toppings (don't stop at the small list I provided; add whatever you'd like!,) it is a whole new level. Don't be intimidated by the lack of dairy! The technique of freezing the bananas for the right amount of time and blending them creates a texture (and flavor, somehow...) pretty indistinguishable from dairy ice cream. I actually prefer it to dairy ice cream!

Ingredients:
***Use these measurements to make a dish with 6 servings***

Ice Cream:
  • 6 large ripe bananas
  • 1/4 teaspoon peppermint extract
  • 1 teaspoon vanilla extract
  • 1 teaspoon agave nectar
  • 1/4 teaspoon salt
  • Optional: 6 drops of green food coloring
Toppings (All optional, but delicious! Mix and match!!):
  • ½ cup of chocolate/carob chips
  • ½ cup of chopped nuts of your choosing
  • ½ cup of ground graham crackers or other cookie/brownie you like
  • Agave nectar/chocolate syrup/caramel

Method:
  1. Cut bananas into slices and put in freezer for AT LEAST 3 hours. If you are using less than 6 bananas, you can get away with a less amount of time, but the bananas must be HARD and completely frozen for you to get the desired consistency.
  2. After time has passed, take bananas out of the freezer and put into the blender. Blend bananas until you have reached a soft-serve-like consistency. This might take a while depending on the power of your blender, and you might have to use a spoon to mix up/push the bananas so they all get blended.
  3. Add the peppermint, vanilla, agave, and salt, and blend until creamy. Towards the end, add green food coloring, if desired.
  4. Immediately take out of blender, mix in toppings of your choosing, and enjoy! 
  5. If you want to save it for later, put it in the freezer; but don't freeze it for any longer than 24 HOURS, or it will turn into an inedible ice-rock of flavor...

Bananas right out of the freezer after a few days... hence the ice. I let it thaw for about 20 minutes.

The mixture in the blender halfway through.

The finished ice cream... it was a little too creamy for my liking, so I put it in the freezer to harden.

A spoon of the ice cream after being in the freezer for 2 hours. I'm not sure if you can tell, but it really looked and felt like dairy ice cream!

Questions? Comments? Suggestions? Did you try this recipe out?
Please let me know in the comments! 

Friday, August 19, 2011

Apple Pear Empanadas (Vegan!)


My good friend Jose requested a Latino dish. Here is my modest attempt!

I don't think pears are a commonly used fruit in empanada-making... but we had some in our house that were extremely ripe, and they made a lovely addition.

As my brother and I began to form the actual empanadas, my siblings' babysitter, Fali, who is from Central America, came over and laughed at our horrible technique. Fortunately, she shared with us the authentic proper way of making empanadas, so I have shared her technique in the recipe. It made the process so much easier!!

I accidentally slightly burnt these empanadas, as I left my brother in charge to tell me when the oven beeped... and he forgot. Moral of the story: if you are cooking, you are responsible for your own food, and you need to keep watch over it. (At least our empanadas were still delicious!)

(Also, sorry for the return of my poor photo quality... the guest photos in my previous recipe really put me to shame!! But I'm trying out new photo techniques, so...)

Ingredients:
***Use these measurements to make a dish with 20 servings***

Shell:
  • 4½ cups of all-purpose flour
  • 3 tablespoons of sugar
  • 2 teaspoon of salt
  • 1 teaspoon of baking powder
  • 1 cup of (vegan) butter/shortening
  • 1 cup of water
  • 1 tablespoon of apple cider vinegar

Filling:
  • 3 apples
  • 2 pears
  • 2 tablespoons of agave nectar
  • ½ teaspoon of cinnamon
  • 1 teaspoon of sugar
  • ½ teaspoon of salt
  • 1 teaspoon of all-purpose flour

Method:
  1. In a large bowl, mix the flour, sugar, salt, and baking powder thoroughly.
  2. Add the butter in spoonfulls and mix in well until integrated wholly into dough.
  3. Pour the water and apple cider vinegar into the dough and mix well. This should make the dough a stiff and firm lump. You can add extra water in increments of teaspoons if your dough is not firm enough.
  4. Knead the dough into a round, cover in plastic wrap, and refrigerate for an hour to chill. 
  5. While dough is chilling, cut apples and pears into slices or chunks; it's up to you... just don't mush them. Mix together.
  6. Drizzle the fruit with agave nectar and mix thoroughly.
  7. Sprinkle the cinnamon, sugar, salt, and flour on the mixture. Mix and let set.
  8. After your dough has chilled for an hour, remove it and roll it out.
  9. Preheat oven to 400°F.
  10. Grease a few pans (we used 4) with nonstick spray or vegan shortening.
  11. Lay out a sheet of wax paper or parchment paper. Coat with nonstick spray/shortening. Also, coat your hands lightly with nonstick spray/shortening. 
  12. Pinch off a small piece of dough and roll into a ball.
  13. Fold wax paper over and use rolling pin (or your hand's pressure) to flatten into a circle. Ours were about 5 inches circumference.
  14. Put about 1½ teaspoons of fruit filling onto center of the dough circle. 
  15. Fold the dough circle over in a semicircle shape and press down the edges with a fork to seal shut. Also, make a small slit in the top of the empanada.
  16. Transfer empanada from wax paper to greased baking pan.
  17. Repeat this process until all dough and filling is used.
  18. Bake for about 20 to 25 minutes until empanadas are golden and crusty.

The finished dough, before entering the fridge. Sorry, I forgot to take photos of the process for this.

The cut up apples and pears. We didn't want apple skin, but we did want pear skin... so we skinned the apples.

The filling in all of its glory.

Small dough ball.

Flatten ball into circle under wax paper.

Fruit in the center of the dough circle.

Folded over and fork-pressed edges. 

1 of our 4 pans of empanadas before entering the oven... as you can see, we still have a long way to go with our technique.

The finished (and slightly burnt) delicious empanadas!

Look at that gooey filling!


Questions? Comments? Suggestions? Did you try this recipe out?
Please let me know in the comments! 

Wednesday, August 17, 2011

Silky Blueberry-Lemon Pancakes (Vegan!)

Photos By: Zach Bergeron

Confession: I am generally not a fan of pancakes. I am on Team Waffle.

However, this recipe made me change my mind.

These are legitimately the BEST pancakes I have ever had in my life!! My entire family loves pancakes, so I've forced myself to consume many different varieties, and I can honestly say nothing compares to these!

One of my closest friends, Zach, leaves for his first year of university this week, and, consequently, we might not see each other again for a very long time. So, as a parting gift/last fun activity to do together, I decided cooking would be a great idea. I asked him what he wanted and he said... pancakes. Specifically lemon pancakes.

I didn't want to deny him this request... so I spent a very long while coming up with a recipe that would please both him and my pancake-averse self, and I definitely succeeded. 

You must try these! They are incredibly easy, so much better than generic pancakes, and so much better for you as well.

ALSO: check out the BEAUTIFUL photography of the pancakes and the process, that I've featured here, taken by Zach. He truly has a gift for conjuring art and beauty of all kinds.

Ingredients:
***Use these measurements to make 12 large servings of this dish***
  • 2 ½ cups non-dairy milk
  • 2 tablespoons of apple-cider vinegar
  • ½ cup of lemon juice (you can add more or less depending on how much lemon flavor you would like)
  • 1 cup of silken or soft tofu
  • ½ cup agave nectar
  • 3 cups of all-purpose flour
  • 2/3 cup of sugar
  • 3 tablespoons of baking powder
  • 2 teaspoons of baking soda
  • 1 teaspoon of salt
  • 8 tablespoons of water
  • 8 tablespoons vegetable oil
  • ½ cup of lemon zest (you can add more or less depending on how much lemon flavor you would like)
  • 1 teaspoon of vanilla extract
  • 2 cups of fresh blueberries
  • Optional Toppings: agave nectar, (vegan) butter, maple syrup, powdered sugar, fresh fruit, your favorite pancake topping!


Method:
  1. In a separate cup, pour the milk and add in the apple cider vinegar and HALF (1/4 cup) of the lemon juice. Do not mix or touch. It will curdle to make a buttermilk-like consistency, which you will use at a later step of the recipe.
  2. Take your tofu, drain the excess water out from the package, and pour remaning lemon juice (1/4 cup) and agave nectar over it. Using a fork, smash the tofu to small crumbles. Let it sit until needed in a later step of the recipe to soak in the flavor. 
  3. In a large bowl, mix the flour, sugar, baking powder, baking soda, and salt thoroughly.
  4. In a separate bowl, combine the water, oil, lemon zest, and vanilla extract thoroughly.
  5. Once the milk/apple cider vinegar/lemon juice is chunky and smells putrid, stir it gently, and then pour it into the water/oil/lemon zest/vanilla mixture. Mix very well.
  6. Add liquid mixture to flour mixture and mix until smooth and no individual ingredients can be seen.
  7. Pour tofu crumbles AND accompanying lemon juice and agave nectar into batter. Mix well. This will make the batter look chunky. Optionally, add in blueberries now, as well; we opted to add them right as we were making the pancakes.
  8. Turn on stove or griddle to a medium heat setting. If using a stove, spray a nonstick pan with nonstick cooking spray. If using a griddle, spray with cooking spray as well.
  9. Once stove/griddle seems hot enough, ladle on pancake batter in a circular manner (or make interesting shapes, it's totally up to you!) 
  10. If you didn't add your blueberries to the original batter, sprinkle your blueberries on top of the pancake batter right as it is laid out on the cooking surface. 
  11. Let it cook until edges are golden brown, and then flip over with a spatula, and let the other side cook for the same amount of time.
  12. Serve immediately (or you could save for later, I guess...) We suggest using agave nectar to complement the agave in the batter, but you should totally use your favorite pancake topping!
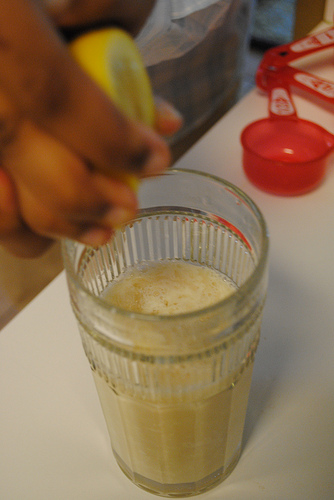
The obligatory vegan 'buttermilk' suspension photo... squeezing in the fresh lemon juice!

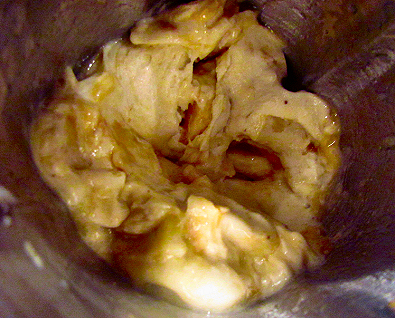
A beautiful shot of our soft tofu; you can use soft or silken for this recipe.

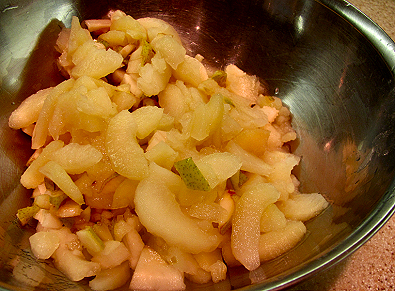
Our mashed up tofu, soaking in the lemon juice and agave.

Zested lemon! If you don't have a zester, you can use a shredder or cut the lemon peel into as small of slivers as you can.

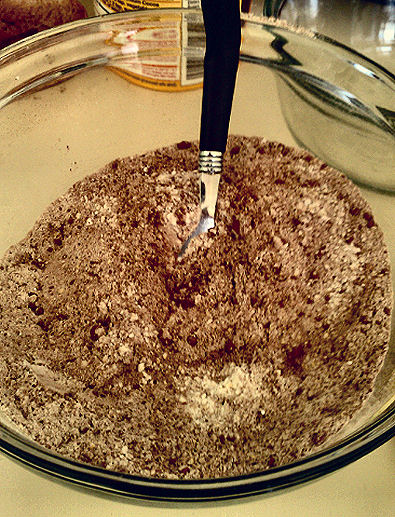
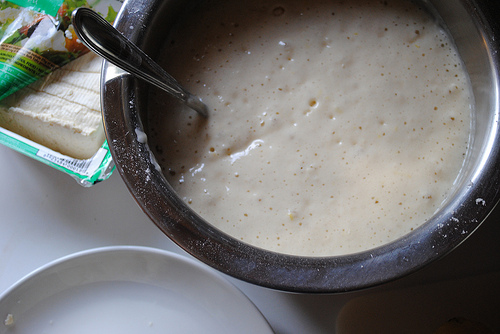
The batter pre-tofu.

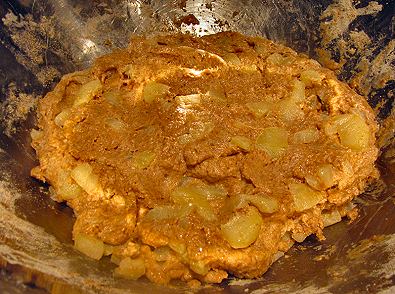
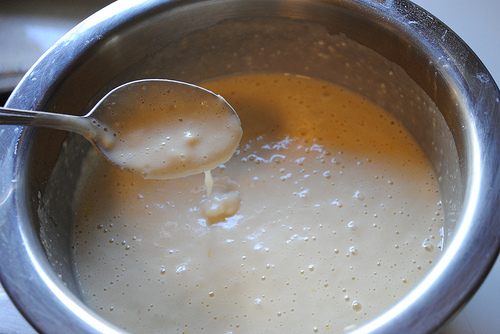
The batter post-tofu.

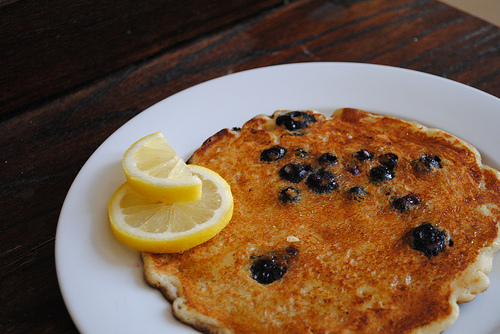
We made pretty large, thick pancakes... but trust me, you will eat them in seconds. Also, we added the blueberries individually to the pancakes, as opposed to pouring them in the batter.

Three gorgeous shots of a finished pancake. We drizzled agave nectar on them and they were divine! 


Questions? Comments? Suggestions? Did you try this recipe out?
Please let me know in the comments!