Showing posts with label snack. Show all posts

Thursday, October 13, 2011

Roasted Vegetable Medley (Vegan!)


Sorry it has been SO LONG since I last updated! I have been extremely busy with school. Also, the fact that I don't have a kitchen of my own at school makes it a bit complicated to cook. However, my friend Kevin Hershey has given me use of his kitchen, so hopefully I will be updating more regularly.

Speaking of Kevin, this is his recipe! It is extremely easy and very straightforward. It can be done with virtually any vegetable, but I thought I would post it anyway, just to remind everyone out there that eating pure vegetables can be a fantastic meal in and of itself!

Don't believe me? I only have two photos of the process, because that is how easy it was to make this delicious dish...

Ingredients:
***Use these measurements to make about 5 servings of this dish***
  • 1 sweet potato
  • 1/2 onion
  • 1 red pepper
  • 1 yellow pepper
  • 1 eggplant
  • 1 tablespoon of Italian seasoning (what we used) / chili powder / basil / any spice you want!
  • 1 tablespoon of black pepper 
  • 3 tablespoons of olive oil
Method:
  1. Preheat oven to 400°F.
  2. Place sweet potato into a large pot. Fill with water, and boil on medium high heat for 15 minutes, or until sweet potato is tender.
  3. While sweet potato is boiling, mince/dice/cut onion, peppers, and eggplant into whatever size you would like to consume them.
  4. Carefully remove sweet potato, and slice it into rounds or pieces.
  5. On a baking pan covered in aluminum foil and baking spray, lay all the vegetables out.
  6. Drizzle vegetables with olive oil, and then use hands to make sure vegetables are thoroughly coated.
  7. Sprinkle vegetables with seasoning and black pepper.
  8. Place into the oven for 1 hour.
  9. Remove from oven and let cool for 15 minutes before eating!
The vegetables and seasoning before the oven...

...and after!


Questions? Comments? Suggestions? Did you try this recipe out?
Please let me know in the comments!

Friday, August 19, 2011

Apple Pear Empanadas (Vegan!)


My good friend Jose requested a Latino dish. Here is my modest attempt!

I don't think pears are a commonly used fruit in empanada-making... but we had some in our house that were extremely ripe, and they made a lovely addition.

As my brother and I began to form the actual empanadas, my siblings' babysitter, Fali, who is from Central America, came over and laughed at our horrible technique. Fortunately, she shared with us the authentic proper way of making empanadas, so I have shared her technique in the recipe. It made the process so much easier!!

I accidentally slightly burnt these empanadas, as I left my brother in charge to tell me when the oven beeped... and he forgot. Moral of the story: if you are cooking, you are responsible for your own food, and you need to keep watch over it. (At least our empanadas were still delicious!)

(Also, sorry for the return of my poor photo quality... the guest photos in my previous recipe really put me to shame!! But I'm trying out new photo techniques, so...)

Ingredients:
***Use these measurements to make a dish with 20 servings***

Shell:
  • 4½ cups of all-purpose flour
  • 3 tablespoons of sugar
  • 2 teaspoon of salt
  • 1 teaspoon of baking powder
  • 1 cup of (vegan) butter/shortening
  • 1 cup of water
  • 1 tablespoon of apple cider vinegar

Filling:
  • 3 apples
  • 2 pears
  • 2 tablespoons of agave nectar
  • ½ teaspoon of cinnamon
  • 1 teaspoon of sugar
  • ½ teaspoon of salt
  • 1 teaspoon of all-purpose flour

Method:
  1. In a large bowl, mix the flour, sugar, salt, and baking powder thoroughly.
  2. Add the butter in spoonfulls and mix in well until integrated wholly into dough.
  3. Pour the water and apple cider vinegar into the dough and mix well. This should make the dough a stiff and firm lump. You can add extra water in increments of teaspoons if your dough is not firm enough.
  4. Knead the dough into a round, cover in plastic wrap, and refrigerate for an hour to chill. 
  5. While dough is chilling, cut apples and pears into slices or chunks; it's up to you... just don't mush them. Mix together.
  6. Drizzle the fruit with agave nectar and mix thoroughly.
  7. Sprinkle the cinnamon, sugar, salt, and flour on the mixture. Mix and let set.
  8. After your dough has chilled for an hour, remove it and roll it out.
  9. Preheat oven to 400°F.
  10. Grease a few pans (we used 4) with nonstick spray or vegan shortening.
  11. Lay out a sheet of wax paper or parchment paper. Coat with nonstick spray/shortening. Also, coat your hands lightly with nonstick spray/shortening. 
  12. Pinch off a small piece of dough and roll into a ball.
  13. Fold wax paper over and use rolling pin (or your hand's pressure) to flatten into a circle. Ours were about 5 inches circumference.
  14. Put about 1½ teaspoons of fruit filling onto center of the dough circle. 
  15. Fold the dough circle over in a semicircle shape and press down the edges with a fork to seal shut. Also, make a small slit in the top of the empanada.
  16. Transfer empanada from wax paper to greased baking pan.
  17. Repeat this process until all dough and filling is used.
  18. Bake for about 20 to 25 minutes until empanadas are golden and crusty.

The finished dough, before entering the fridge. Sorry, I forgot to take photos of the process for this.

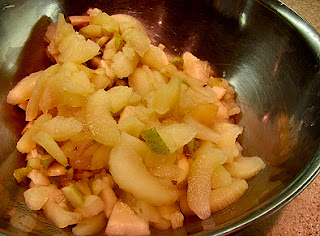
The cut up apples and pears. We didn't want apple skin, but we did want pear skin... so we skinned the apples.

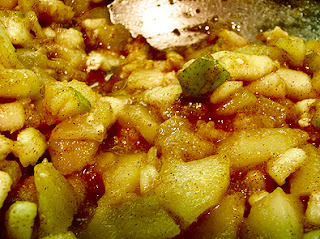
The filling in all of its glory.

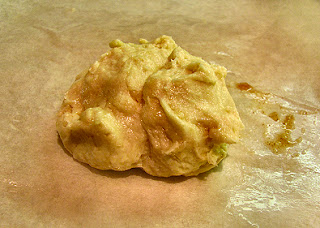
Small dough ball.

Flatten ball into circle under wax paper.

Fruit in the center of the dough circle.

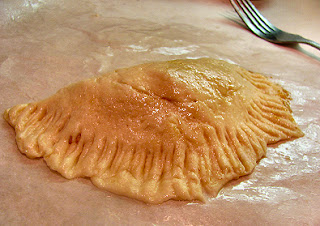
Folded over and fork-pressed edges. 

1 of our 4 pans of empanadas before entering the oven... as you can see, we still have a long way to go with our technique.

The finished (and slightly burnt) delicious empanadas!

Look at that gooey filling!


Questions? Comments? Suggestions? Did you try this recipe out?
Please let me know in the comments! 

Wednesday, August 17, 2011

Silky Blueberry-Lemon Pancakes (Vegan!)

Photos By: Zach Bergeron

Confession: I am generally not a fan of pancakes. I am on Team Waffle.

However, this recipe made me change my mind.

These are legitimately the BEST pancakes I have ever had in my life!! My entire family loves pancakes, so I've forced myself to consume many different varieties, and I can honestly say nothing compares to these!

One of my closest friends, Zach, leaves for his first year of university this week, and, consequently, we might not see each other again for a very long time. So, as a parting gift/last fun activity to do together, I decided cooking would be a great idea. I asked him what he wanted and he said... pancakes. Specifically lemon pancakes.

I didn't want to deny him this request... so I spent a very long while coming up with a recipe that would please both him and my pancake-averse self, and I definitely succeeded. 

You must try these! They are incredibly easy, so much better than generic pancakes, and so much better for you as well.

ALSO: check out the BEAUTIFUL photography of the pancakes and the process, that I've featured here, taken by Zach. He truly has a gift for conjuring art and beauty of all kinds.

Ingredients:
***Use these measurements to make 12 large servings of this dish***
  • 2 ½ cups non-dairy milk
  • 2 tablespoons of apple-cider vinegar
  • ½ cup of lemon juice (you can add more or less depending on how much lemon flavor you would like)
  • 1 cup of silken or soft tofu
  • ½ cup agave nectar
  • 3 cups of all-purpose flour
  • 2/3 cup of sugar
  • 3 tablespoons of baking powder
  • 2 teaspoons of baking soda
  • 1 teaspoon of salt
  • 8 tablespoons of water
  • 8 tablespoons vegetable oil
  • ½ cup of lemon zest (you can add more or less depending on how much lemon flavor you would like)
  • 1 teaspoon of vanilla extract
  • 2 cups of fresh blueberries
  • Optional Toppings: agave nectar, (vegan) butter, maple syrup, powdered sugar, fresh fruit, your favorite pancake topping!


Method:
  1. In a separate cup, pour the milk and add in the apple cider vinegar and HALF (1/4 cup) of the lemon juice. Do not mix or touch. It will curdle to make a buttermilk-like consistency, which you will use at a later step of the recipe.
  2. Take your tofu, drain the excess water out from the package, and pour remaning lemon juice (1/4 cup) and agave nectar over it. Using a fork, smash the tofu to small crumbles. Let it sit until needed in a later step of the recipe to soak in the flavor. 
  3. In a large bowl, mix the flour, sugar, baking powder, baking soda, and salt thoroughly.
  4. In a separate bowl, combine the water, oil, lemon zest, and vanilla extract thoroughly.
  5. Once the milk/apple cider vinegar/lemon juice is chunky and smells putrid, stir it gently, and then pour it into the water/oil/lemon zest/vanilla mixture. Mix very well.
  6. Add liquid mixture to flour mixture and mix until smooth and no individual ingredients can be seen.
  7. Pour tofu crumbles AND accompanying lemon juice and agave nectar into batter. Mix well. This will make the batter look chunky. Optionally, add in blueberries now, as well; we opted to add them right as we were making the pancakes.
  8. Turn on stove or griddle to a medium heat setting. If using a stove, spray a nonstick pan with nonstick cooking spray. If using a griddle, spray with cooking spray as well.
  9. Once stove/griddle seems hot enough, ladle on pancake batter in a circular manner (or make interesting shapes, it's totally up to you!) 
  10. If you didn't add your blueberries to the original batter, sprinkle your blueberries on top of the pancake batter right as it is laid out on the cooking surface. 
  11. Let it cook until edges are golden brown, and then flip over with a spatula, and let the other side cook for the same amount of time.
  12. Serve immediately (or you could save for later, I guess...) We suggest using agave nectar to complement the agave in the batter, but you should totally use your favorite pancake topping!
The obligatory vegan 'buttermilk' suspension photo... squeezing in the fresh lemon juice!

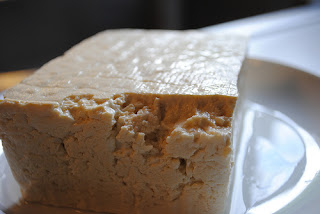
A beautiful shot of our soft tofu; you can use soft or silken for this recipe.

Our mashed up tofu, soaking in the lemon juice and agave.

Zested lemon! If you don't have a zester, you can use a shredder or cut the lemon peel into as small of slivers as you can.

The batter pre-tofu.

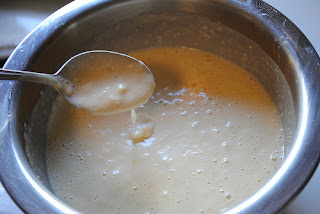
The batter post-tofu.

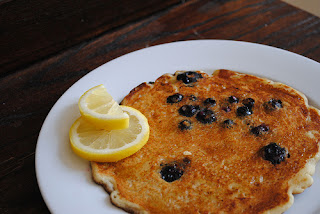
We made pretty large, thick pancakes... but trust me, you will eat them in seconds. Also, we added the blueberries individually to the pancakes, as opposed to pouring them in the batter.

Three gorgeous shots of a finished pancake. We drizzled agave nectar on them and they were divine! 


Questions? Comments? Suggestions? Did you try this recipe out?
Please let me know in the comments!

Tuesday, August 16, 2011

Fruit-Filled Soda Bread (Vegan!)


Today, my brother and I wanted to try something other than a dessert, so as we were brainstorming, we both remembered this AMAZING soda bread we were given by the Irish booth at an international festival. They also gave us the recipe for how to make it at home. So, I took the recipe, veganized it, and... added in fruit, because my siblings and I are obsessed with fruit-flavored things. The fruit also moistened the bread, giving it just a hint of sweetness.

You can pretty much use any fruit you want that can hold its shape and is not to runny. I would advise staying away from citrus, for example. We chose bananas and PRUNES.

PLEASE GIVE PRUNES A CHANCE! So many people refuse to try prunes, because of their less-than-desirable reputation and appearance, but they are one of my favorite foods in the world. They are delicious, moist, easy to snack on, extremely good for you, and readily available everywhere. If not in the bread, try them alone and see how much you'll like them! You don't have to be a baby or a senior citizen to enjoy these lovely dried plums.

Ingredients:
***Use these measurements to make 2 loaves of this dish***
  • ¾ cup non-dairy milk
  • 3 tablespoons apple cider vinegar
  • 1 teaspoon vanilla extract
  • 2 ½ cups of all-purpose OR whole wheat flour
  • 1 ½ teaspoons of baking soda
  • 1 tablespoon of baking powder
  • ½ teaspoon of salt
  • 4 tablespoons of white sugar
  • ¾ cup of (vegan) butter
  • ½ cup of chopped, pitted prunes (or fruit of your choice)
  • 1 chopped up banana (or fruit of your choice)
  • Optional Toppings: agave nectar, (vegan) butter

Method:
  1. Preheat oven to 385°F.
  2. Grease a baking sheet with nonstick spray or vegan shortening.
  3. In a separate cup, pour the milk and add in the apple cider vinegar and vanilla extract. Do not mix or touch. It will curdle to make a buttermilk-like consistency, which you will use at a later step of the recipe.
  4. In a large bowl, mix the flour, baking powder, baking soda, sugar, and salt.
  5. Soften the butter in the microwave (until it is SOFT, not melted,) and add to the flour mixture. Mix this thoroughly. 
  6. Add the chopped up prunes and bananas (or whatever fruit of your choosing) to the mixture.
  7. Once the milk/apple cider vinegar/vanilla mixture is chunky and smells putrid, stir it gently, and then pour it into the flour mixture until it reaches a firm, dough-like consistency.
  8. Take the dough to a floured area, and knead gently until a secure ball is formed and the ingredients are certainly combined.
  9. Break your secure dough ball into two smaller balls, and place onto the baking sheet.
  10. Bake in the oven for 30 to 40 minutes, depending on how crispy you want your bread/how powerful your oven is.
  11. Let bread cool to room temperature before serving. 
  12. Serve with (vegan) butter or agave for an extra-special treat!
The vegan vanilla 'buttermilk' suspension of soy milk, apple cider vinegar, and vanilla extract. 

The giant ball of dough being kneaded in flour.

 The two dough-balls separated on the greased sheet.
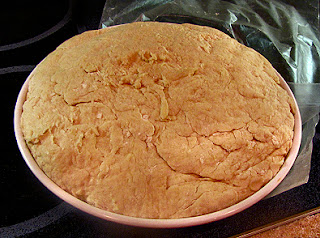
The bread right out of the oven. We wanted it to be crispy and crusty, but not burnt, and it was!

A close up of the bread.

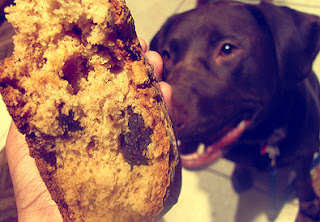
Denali really wanted some... but unfortunately, prunes ARE NOT dog-friendly, so he could only look on at the delicious slice in jealousy.


Questions? Comments? Suggestions? Did you try this recipe out?
Please let me know in the comments!

Thursday, August 4, 2011

Cilantro-Mint Chutney (Vegan!)


My first Indian recipe for Vegephant! My whole family comes from South India, so my mom shows me different recipes to make all the time. This morning, she asked me to make a chutney (sauce) using the ton of cilantro and mint we had at home, so I created this one with my sister.

This chutney is EXTREMELY versatile! You can use it as a sandwich spread, a chip/veggie dip, or pair it up with traditional Indian dishes. In high school, my mom used to put this kind of chutney on the sandwiches I'd take to school to spice it up. This chutney can also store well for like... a month, so make a lot and save it! It's a bit on the spicy side, so use less chilies to lower the heat.

Ingredients:
***Use these measurements to make about 2 cups of chutney***
  • 1 large bunch/bundle of cilantro leaves
  • 2/3 of the above amount of mint leaves (3:2 ratio of cilantro to mint)
  • 1 jalapeno/green chili pepper – chopped
  • ¼ of a ginger – chopped
  • 1 teaspoon of cumin seeds
  • 1 teaspoon of sugar
  • 2 teaspoons of salt
  • 1 sprinkle of asafoetida/hing powder (easily found at Indian/Middle Eastern grocery stores) OR garlic powder (the tastes will be pretty different depending on what you choose; I used asafoetida in this recipe, which is more traditional)
  • 3 tablespoons of lemon juice
  • 1 teaspoon olive oil

Method:
  1. Put all ingredients, except for mint and cilantro, into the blender. Blend into a fine paste; the cumin seeds might not be totally crushed, and that is okay.
  2. Individually take mint leaves off stem and add all to blender. Blend until mixture is a paste again.
  3. Chop up the cilantro stalk, trying to get as least of the stem as possible, and add into blender in batches. If mixture becomes too dry, add some water (be careful though; too much water will make it runny!)
  4. Blend all the cilantro in until a sauce-like consistency is formed. Try out the chutney; add more salt, lemon juice, or chili, if needed, and blend until smooth.
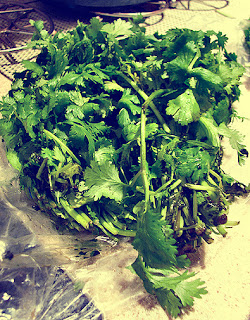
It was a lot of cilantro...

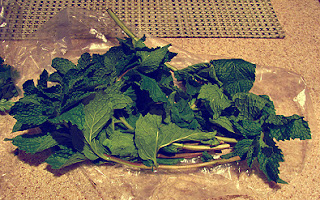
...and about 2/3 the amount of mint. This creates an awesome subtle spicy and minty meld.

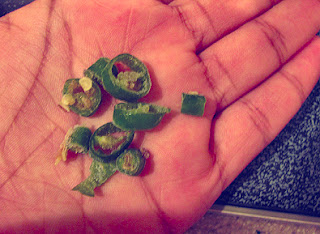
This is the amount of chili pepper I used, for reference.

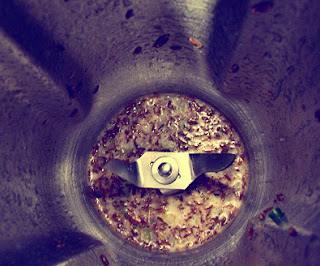
The ingredients in the blender. (I thought this would be an interesting image... I was wrong.)

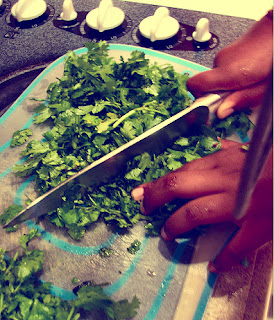
 I was originally going to take the cilantro leaves off the stems individually... until my sister showed me this method of just cutting them and including minimal stem. So thanks to her! This is her showing the cutting.

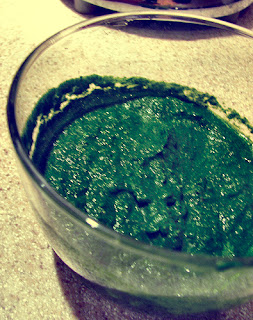
The final product! It's a beautiful color that you can use with virtually any food and store for weeks!


Questions? Comments? Suggestions? Did you try this recipe out?
Please let me know in the comments!
Monday, August 1, 2011

Spicy Pineapple Bites (Vegan!)


My siblings and I are really involved in our local Indian cultural scene. We have dance practices for some event or another almost every week, and the rehearsal is at a different house every week. After the hours of dancing and directing, everyone wants something satisfying and filling to eat. 

Normally, whenever the practices are at our house, my mom will prepare a few (dozen) snacks, such as fruits or cookies. However, she had the wonderful idea today of making some finger sandwiches--or bites, as I've dubbed them here--as today's practice was going to run fairly late. 

We came up with this interesting flavor combination, and were pretty wary of what the others' reactions were going to be to our strange snack. Luckily, everyone LOVED them! Everyone asked us for the recipe, as it was such an easy and unique dish. So, I thought I'd share the recipe here, as simple as it may be.  

(Regarding the photos... I'm clearly still working on those!)

Ingredients:
***Use these measurements to make a dish with 20 servings***
  • 1 loaf of firm sliced bread
  • 10 walnuts
  • 1 cup pineapple chunks
  • 2 teaspoons of black pepper 
  • 1/2 teaspoon of salt
  • 1 package of (vegan) cream cheese 
  • 1 teaspoon of Sriracha Sauce (or however much you can handle!)
  • Optional: 1 teaspoon of sugar, only if your pineapple is on the bitter/sour side
Method:
  1. Put loaf of bread in freezer to keep its density.
  2. Crush or grind walnuts until they are a little denser than powder.
  3. In a bowl, mix the pineapple (with optional sugar,) salt, and pepper. If you want a creamier, more sauce-like filling, you can put this mixture into a food processor or blender on pulse until a paste forms.
  4. Add cream cheese package and Sriracha sauce to pineapple mixture, and mix thoroughly. 
  5. Fold crushed walnuts into the mixture.
  6. Get bread out of freezer. Optionally, cut off the crusts of the bread for presentation, if you would like.
  7. Spread the mixture onto the slices of bread, and cover with other slices to make sandwiches.
  8. Cut sandwiches into fourths, to make bite-sized delights.
  9. Put bites into refrigerator for at least an hour, and serve chilled (and with some Sriracha sauce for dipping!)
Came across this awesome mortar and pestle my mom had, so I destroyed the walnuts with this instead of a food processor.

The consistency my mom wanted our pineapple/salt/pepper mixture to be... it was surprisingly dense in the end!


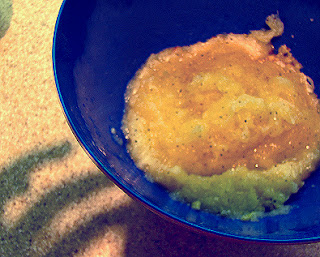
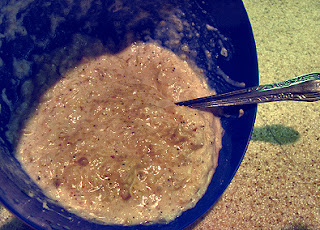
The spread in the end... please trust me, it's a LOT more appetizing than it looks here! And you can totally use this spread for more than just on bread. It would be great as a veggie or chip dip!


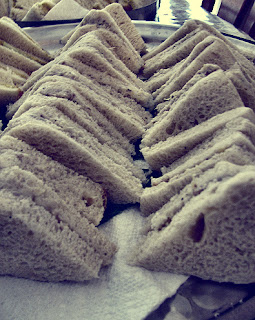
My mom and I served these bites to about 15 people... the bites were all gone in less than 5 minutes!

Questions? Comments? Suggestions? Did you try this recipe out?
Please let me know in the comments!