Wednesday, August 10, 2011

Strawberry Crumbling Cake (Vegan!)


Today, my brother sent me a text saying, "Can we bake today?" So, right when we both got home, we went into the kitchen, picked out a bunch of ingredients on the fly, made up this recipe with no prior preparation, and somehow... created this AMAZING cake with an extremely unique texture. It's like between a coffee cake and a pound cake--but I wouldn't call it a crumb cake. When my mom was helping me pack up the leftovers of this cake into the fridge, she said the cake kept crumbling; hence, I decided to name this cake the crumbling cake!

Ingredients:
***Use these measurements to make about 12 servings of this dish***
  • 1 cup of (vegan) butter/margarine/shortening
  • 1½ cups of sugar
  • 2 teaspoons of water
  • 1 tablespoon of oil
  • 2 cups of all-purpose flour
  • 2 teaspoons of baking powder
  • 1 teaspoon of baking soda
  • ½ cup of non-dairy milk 
  • 1 tablespoon of apple cider vinegar
  • 3 teaspoons of vanilla extract
  • 2 cups of ripe strawberries
  • ½ cup of brown sugar
  • 1 teaspoon of ground cinnamon/cinnamon powder

Method:
  1. Preheat oven to 350°F.
  2. Grease a cake pan with nonstick spray or vegan shortening.
  3. In a separate cup, pour the milk and add in the apple cider vinegar. Do not mix or touch. It will curdle to make a buttermilk-like consistency, which you will use at a later step of the recipe.
  4. In a large bowl, mix the butter, sugar (NOT the brown sugar,) water, and oil thoroughly.
  5. Add the flour, baking powder, and baking soda to the butter mixture and continue to mix.
  6. Once the milk and apple cider vinegar mixture is chunky and smells putrid, stir it gently, and then mix it into the flour mixture. Add vanilla extract at this time as well.
  7. Cut the strawberries into small pieces and fold in to mixture. 
  8. Once all parts of the mixture are thoroughly mixed, pour into cake pan and even out.
  9. Sprinkle the brown sugar and cinnamon loosely on top to your pleasing.
  10. Bake for 1 hour, or until fork inserted into the center of the dish comes out dry and clean.
  11. Let loaf cool, and then devour.


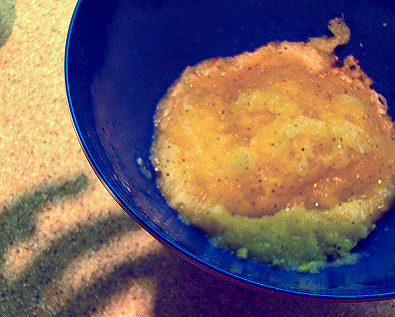
The "vegan buttermilk" (non-dairy milk and apple cider vinegar) mixture curdling.


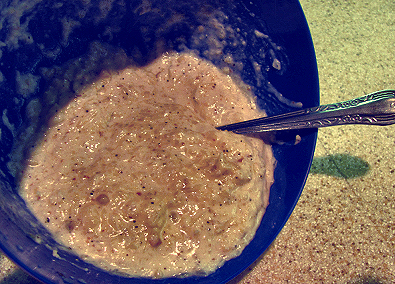
The cake batter in its final stage.

The brown sugar and cinnamon sprinkled on top of the batter.
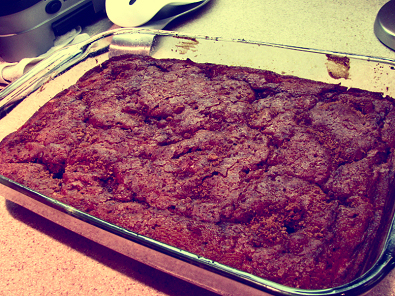

The cake right out of the oven.


A close-up of a slice of the Strawberry Crumbling Cake! Look at that peeking strawberry.


Questions? Comments? Suggestions? Did you try this recipe out?
Please let me know in the comments!

Monday, August 8, 2011

Peanut-Butter Ice Cream (& Toppings) (Vegan!)


So, banana ice cream is basically one of the vegan staples, I've noticed. However, I rarely come across other vegan ice cream flavor recipes that don't require an ice cream maker... which I don't have. So I experiment a LOT with making my own vegan ice cream flavors using just my blender. My brother and I made this peanut-butter ice cream tonight, and it is definitely a winner in our book!

It is supremely decadent on its own, but when you add toppings (don't stop at the small list I provided; add whatever you'd like!,) it is a whole new level. Don't be intimidated by the lack of dairy! The technique of freezing the bananas for the right amount of time and blending them creates a texture (and flavor, somehow...) pretty indistinguishable from dairy ice cream. I actually prefer it to dairy ice cream!

Ingredients:
***Use these measurements to make a dish with 6 servings***

- Ice Cream:
  • 6 large ripe bananas
  • 1 or 2 tablespoon(s) of natural peanut butter (depends on how much you like peanut butter!)
  • 1 teaspoon cinnamon
  • 1 teaspoon vanilla extract
  • 1 teaspoon agave nectar
  • 1/4 teaspoon salt
- Toppings (All optional, but delicious! Mix and match!!):
  • ½ cup of chocolate/carob chips
  • ½ cup of chopped nuts of your choosing
  • ½ cup of ground graham crackers or other cookie/brownie you like
  • Agave nectar/chocolate syrup/caramel

Method:
  1. Cut bananas into slices and put in freezer for AT LEAST 3 hours. If you are using less than 6 bananas, you can get away with a less amount of time, but the bananas must be HARD and completely frozen for you to get the desired consistency.
  2. After time has passed, take bananas out of the freezer and put into the blender. Blend bananas until you have reached a soft-serve-like consistency. This might take a while depending on the power of your blender, and you might have to use a spoon to mix up/push the bananas so they all get blended.
  3. Add the peanut butter, cinnamon, salt, agave, and vanilla, and blend until creamy.
  4. Immediately take out of blender, mix in toppings of your choosing, and enjoy! 
  5. If you want to save it for later, put it in the freezer; but don't freeze it for any longer than 24 HOURS, or it will turn into an inedible ice-rock of flavor...
Our extremely ripe bananas!

The banana slices after freezing.

Some of the toppings we folded in: crushed graham cracker, brownie bits, and crushed almond! 

The finished peanut-butter ice cream (it felt like soft serve) with chocolate chips added in as well!

Questions? Comments? Suggestions? Did you try this recipe out?
Please let me know in the comments! 

Thursday, August 4, 2011

Cilantro-Mint Chutney (Vegan!)


My first Indian recipe for Vegephant! My whole family comes from South India, so my mom shows me different recipes to make all the time. This morning, she asked me to make a chutney (sauce) using the ton of cilantro and mint we had at home, so I created this one with my sister.

This chutney is EXTREMELY versatile! You can use it as a sandwich spread, a chip/veggie dip, or pair it up with traditional Indian dishes. In high school, my mom used to put this kind of chutney on the sandwiches I'd take to school to spice it up. This chutney can also store well for like... a month, so make a lot and save it! It's a bit on the spicy side, so use less chilies to lower the heat.

Ingredients:
***Use these measurements to make about 2 cups of chutney***
  • 1 large bunch/bundle of cilantro leaves
  • 2/3 of the above amount of mint leaves (3:2 ratio of cilantro to mint)
  • 1 jalapeno/green chili pepper – chopped
  • ¼ of a ginger – chopped
  • 1 teaspoon of cumin seeds
  • 1 teaspoon of sugar
  • 2 teaspoons of salt
  • 1 sprinkle of asafoetida/hing powder (easily found at Indian/Middle Eastern grocery stores) OR garlic powder (the tastes will be pretty different depending on what you choose; I used asafoetida in this recipe, which is more traditional)
  • 3 tablespoons of lemon juice
  • 1 teaspoon olive oil

Method:
  1. Put all ingredients, except for mint and cilantro, into the blender. Blend into a fine paste; the cumin seeds might not be totally crushed, and that is okay.
  2. Individually take mint leaves off stem and add all to blender. Blend until mixture is a paste again.
  3. Chop up the cilantro stalk, trying to get as least of the stem as possible, and add into blender in batches. If mixture becomes too dry, add some water (be careful though; too much water will make it runny!)
  4. Blend all the cilantro in until a sauce-like consistency is formed. Try out the chutney; add more salt, lemon juice, or chili, if needed, and blend until smooth.
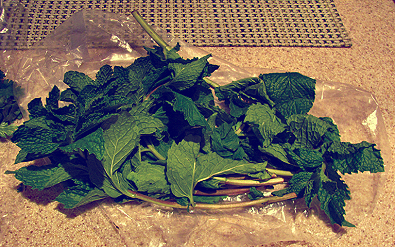
It was a lot of cilantro...

...and about 2/3 the amount of mint. This creates an awesome subtle spicy and minty meld.

This is the amount of chili pepper I used, for reference.

The ingredients in the blender. (I thought this would be an interesting image... I was wrong.)

 I was originally going to take the cilantro leaves off the stems individually... until my sister showed me this method of just cutting them and including minimal stem. So thanks to her! This is her showing the cutting.

The final product! It's a beautiful color that you can use with virtually any food and store for weeks!


Questions? Comments? Suggestions? Did you try this recipe out?
Please let me know in the comments!

Wednesday, August 3, 2011

Peanut Butter-Mint Chocolate Swirl Squares (Vegan!)


So... this recipe is actually a mistake. I had intended to make something akin to peanut butter cups in square form. However, during my recipe process, my dog Denali (pictures below) decided to headbutt me, causing the chocolate chips to fall into the peanut butter and mix.

Thank you Denali!

Because of Denali's nudge, the recipe is now more awesome than I could have imagined! With the bottom layer having the bite of mint, the top layer contrast between the hard chocolate and the surprisingly smooth (it doesn't harden in the freezer) and sweet peanut butter, and the beautiful marble pattern--ah, I am just so happy with this! This is also SUPER easy and super delicious to make, for anyone, so you should definitely give it a try!!

Ingredients:
***Use these measurements to make a dish with ~30 servings***
  • 1 bag of vegan chocolate/carob chips (I used dairy-free chocolate)
  • 1 tablespoon mint extract
  • 1 cup of (natural) peanut butter (or sunbutter/almond butter/etc.)
  • 4 graham crackers
  • 2 tablespoons of confectioners' sugar
Method:
  1. Pour half the bag of chocolate/carob chips into a microwaveable flat glass container evenly, so all parts of the container are covered.
  2. Put chips in the microwave for 1 minute. 
  3. Chips will be soft; take spoon and press/stir them to cover more surface area.
  4. Add mint extract to chocolate and stir well.
  5. Put chips back in microwave for other minute until chocolate is melted and fills up bottom half of container.
  6. Put chips in the freezer for 2-3 hours.
  7. Crush graham crackers to fine crumbs, or use a food processor.
  8. Mix peanut butter, confectioners’ sugar, and graham crackers thoroughly. If you are using natural peanut butter, the measurements given should be correct; if you are using ‘regular’ peanut butter, you may want to add more graham cracker crumbs.
  9. Take frozen chocolate out of the freezer and spread peanut butter mixture over it.
  10. Add remaining chocolate chips from the bag to the top of the peanut butter and melt in microwave for 3 minutes.
  11. Take spoon and swirl melted chocolate with peanut butter.
  12. Return dish to freezer and freeze for 3 more hours minimum. 
  13. Before serving, allow to thaw for 1 hour at room temperature, cut into squares, and enjoy!
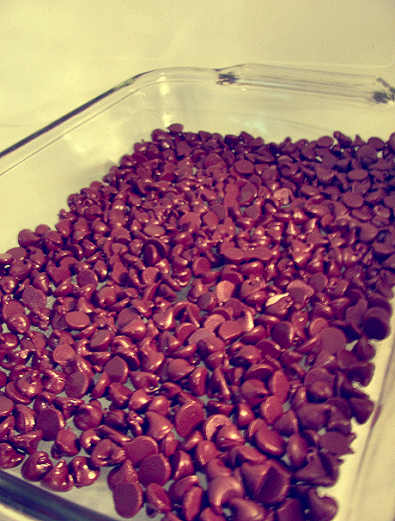
The chocolate chips spread across the bottom.

Halfway through the first melting...

...after mixing the above photo!

After adding the peanut butter mixture on top of the chocolate.

And then this guy interfered!

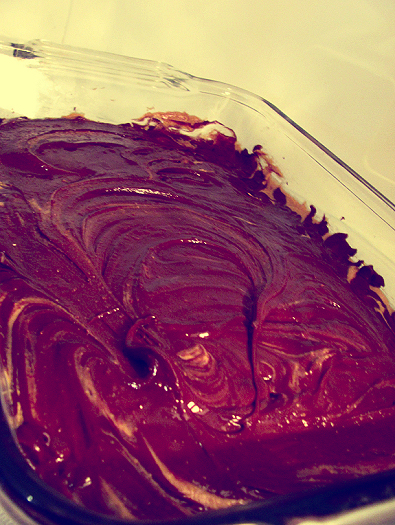
The peanut butter and chocolate swirled together.

Right before it entered the freezer the second time.

The lovely final product! (There was different lighting... can you tell?)


A few 'squares' ready to be devoured!


Questions? Comments? Suggestions? Did you try this recipe out?
Please let me know in the comments! 

Monday, August 1, 2011

Spicy Pineapple Bites (Vegan!)


My siblings and I are really involved in our local Indian cultural scene. We have dance practices for some event or another almost every week, and the rehearsal is at a different house every week. After the hours of dancing and directing, everyone wants something satisfying and filling to eat. 

Normally, whenever the practices are at our house, my mom will prepare a few (dozen) snacks, such as fruits or cookies. However, she had the wonderful idea today of making some finger sandwiches--or bites, as I've dubbed them here--as today's practice was going to run fairly late. 

We came up with this interesting flavor combination, and were pretty wary of what the others' reactions were going to be to our strange snack. Luckily, everyone LOVED them! Everyone asked us for the recipe, as it was such an easy and unique dish. So, I thought I'd share the recipe here, as simple as it may be.  

(Regarding the photos... I'm clearly still working on those!)

Ingredients:
***Use these measurements to make a dish with 20 servings***
  • 1 loaf of firm sliced bread
  • 10 walnuts
  • 1 cup pineapple chunks
  • 2 teaspoons of black pepper 
  • 1/2 teaspoon of salt
  • 1 package of (vegan) cream cheese 
  • 1 teaspoon of Sriracha Sauce (or however much you can handle!)
  • Optional: 1 teaspoon of sugar, only if your pineapple is on the bitter/sour side
Method:
  1. Put loaf of bread in freezer to keep its density.
  2. Crush or grind walnuts until they are a little denser than powder.
  3. In a bowl, mix the pineapple (with optional sugar,) salt, and pepper. If you want a creamier, more sauce-like filling, you can put this mixture into a food processor or blender on pulse until a paste forms.
  4. Add cream cheese package and Sriracha sauce to pineapple mixture, and mix thoroughly. 
  5. Fold crushed walnuts into the mixture.
  6. Get bread out of freezer. Optionally, cut off the crusts of the bread for presentation, if you would like.
  7. Spread the mixture onto the slices of bread, and cover with other slices to make sandwiches.
  8. Cut sandwiches into fourths, to make bite-sized delights.
  9. Put bites into refrigerator for at least an hour, and serve chilled (and with some Sriracha sauce for dipping!)
Came across this awesome mortar and pestle my mom had, so I destroyed the walnuts with this instead of a food processor.

The consistency my mom wanted our pineapple/salt/pepper mixture to be... it was surprisingly dense in the end!


The spread in the end... please trust me, it's a LOT more appetizing than it looks here! And you can totally use this spread for more than just on bread. It would be great as a veggie or chip dip!


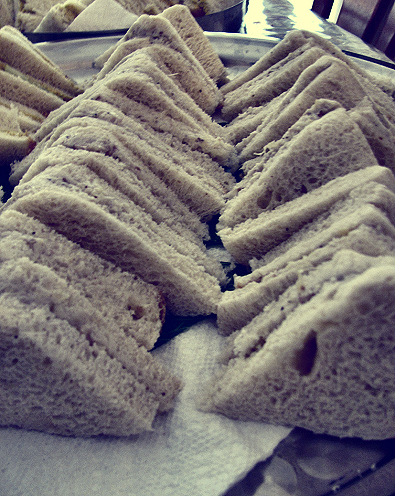
My mom and I served these bites to about 15 people... the bites were all gone in less than 5 minutes!


Questions? Comments? Suggestions? Did you try this recipe out?
Please let me know in the comments! 


Saturday, July 30, 2011

Carrot Loaf-Cake with Orange Glaze (Vegan!)


Hello everyone! Thank you so much for supporting me by reading my ~first post~ on my random whim to start a food blog. I honestly do appreciate all the encouragement.

I am much better at making main entrees (especially that of the Indian type,) but this summer, I've been learning to bake more, so I thought I'd start out Vegephant with a lovely, super easy recipe I came up with tonight.

I made this with my siblings, and we were inspired by (get ready for a Florida moment) the famous cute Publix carrot cakes. It's our Dad's birthday on Monday, and he has a habit of buying the Publix cakes for EVERY special occasion in our household. So, we thought we would make him our own, healthier version of the cake. And, instead of the really heavy frosting, we decided to make an orange glaze instead, as our Dad really likes oranges. The flavors really meld together quite beautifully. My siblings had the idea of drawing a carrot in the glaze with food coloring to mimic the Publix carrot. That... didn't come out too well, but I hope my Dad will appreciate the sentiment and the flavors!

Also, please excuse my HORRIFIC first attempt at food photography! I really apologize for the food seeming completely unappetizing, but please try out this recipe and you'll see that it really isn't.... (I hope!) I got some tips from my experienced friends about photographing food, so hopefully my pictures will improve from here on out.

Ingredients:
***Use these measurements to make a dish with 8 servings***

- Loaf:
  • 1 ½ cups of whole wheat flour (you can use whole wheat pastry flour also if you want a fluffier result)
  • 1 cup of sugar
  • 1 ½ teaspoons of cinnamon
  • ½ teaspoon of salt
  • 1 teaspoon of baking powder
  • 1 teaspoon of baking soda
  • 1 teaspoon of vanilla extract
  • 1 whole carrot (or ~10 baby carrots) – shredded
  • 1 ½ cups unsweetened applesauce (or 2 or 3 applesauce cups, depending how much moisture you want)

- Glaze:
  • 1 package of (vegan) cream cheese
  • 1 teaspoon of orange extract (you can actually use whatever extract you have on hand; vanilla, lemon, maple, or almond extract all sound like they'd be wonderful, too)
  • 1 cup of confectioners’ sugar (add more or less depending on the consistency you want)
  • 1 teaspoon of (non-dairy) milk

Method:
  1. Preheat oven to 350°F.
  2. Grease a loaf pan with nonstick spray or vegan shortening.
  3. In a bowl, mix the flour, sugar, cinnamon, salt, baking powder, and baking soda well. 
  4. Separately, in a different bowl, mix applesauce, vanilla extract, and shredded carrots well.
  5. Add the flour mixture to the applesauce mixture in small batches, making sure to mix all the ingredients thoroughly.
  6. Pour your batter into your greased pan, three-fourths of the way.
  7. Bake for 45 minutes, or until fork inserted into the center of the dish comes out dry and clean.
  8. Using a whisk, combine cream cheese, extract, milk, and confectioners’ sugar until you cannot see the individual ingredients. Add more or less confectioners’ sugar depending on if you’d prefer a more frosting or glaze-like consistency.
  9. After loaf is done, cool on a wire rack for a few hours.
  10. Once cool, drizzle glaze over loaf and let chill in fridge for a few hours before serving.

The final stage of the loaf batter.

The loaf right as it finished in the oven.

The consistency of our finished glaze.

The finished Carrot Loaf-Cake with Orange Glaze (and a silly carrot drawing!)

Questions? Comments? Suggestions? Did you try this recipe out?
Please let me know in the comments!